RecipesUS

Top Food Blogs
Showing posts with label All-Purpose Flour. Show all posts

Sunday, September 27, 2015

Raspberry Limeade Cupcakes


Raspberry Limeade Cupcakes~
Yield: 2 dozen

I made these for a girls night, and they were a hit :) These little gems, scream summer! If you like food coloring, than add a few drops of green to the cupcake batter. I'm not a fan of the artificial coloring, since I had read somewhere that the food dye is tested on animals.

Cupcake Batter
1 1/2 cups plain unsweetened hemp milk (really any non-dairy milk will work)
1/2 cup lime juice
2 1/2 cups unbleached all-purpose flour
1 1/3 cups sugar
1 teaspoon baking soda
1 teaspoon salt
2/3 cups melted coconut oil
1 teaspoon vanilla extract
2 Tablespoons lime zest chopped

1. Preheat the oven to 350 degrees.

2. Combine non-dairy milk and lime juice in a medium bowl. Allow to sit for 10 minutes to thicken. In a large bowl, whisk together the flour, sugar, baking soda, and salt. Set aside. Add coconut oil, vanilla extract, and lime zest to the lime juice non-dairy milk mixture, whisking to combine.

3. Add wet ingredients to the flour mixture, stirring gently till no longer lumpy and the batter is smooth. Divide batter evenly into lined cupcake pan.

4. Bake for 35 minutes or until a toothpick inserted into the center comes out clean. Repeat the process till all of the batter is gone.

5. Allow the cupcakes to cool before frosting.

Raspberry Frosting
2 cups powdered sugar
1/2 cup raspberries, pureed
1/4 cup vegetable shortening
2 Tablespoons vegan margarine
hemp milk to thin

1. Add pureed raspberries, vegetable shortening, vegan margarine and powdered sugar in a bowl. Blend until smooth, adding non-dairy milk to desired consistency.

2. Frost cupcakes and enjoy!

Tuesday, November 12, 2013

Money Saving Biscuits

Money Saving Biscuits
Vegan; Soy Free; 25 minutes

In my quest to omit Earth Balance (see prior postings) from as many of my recipes, here is a biscuit recipe that I made last night. Since I used coconut yogurt, these come out super light. Here I used Spectrum Organic Vegetable Shortening. They have it printed right on the package "... Even better are the dozen of small family farmers in Colombia who cultivate and press our palm oil in an environmentally sustainable manner...." Not that I believe everything right off the package. But going to their website and clicking the link to their parent company; they have their corporate 2012 standards for transparency.

2 cups organic all purpose flour
2 teaspoons baking powder
1/2 teaspoon sea-salt
1 teaspoon vegetable shortening
1 Tablespoon coconut yogurt
1 cup unsweetened hemp milk

1. Preheat oven to 425 F degrees.

2. In a large bowl combine flour, baking powder and salt. Add vegetable shortening and coconut yogurt. Taking either 2 butter knives or a pastry blender and cut shortening and yogurt into the flour. Slowly add milk and continue to combine till all the liquid is gone and a soft dough forms.

3. Drop dough, 1 1/2 inches apart, evenly onto baking sheet. Bake for 10 minutes and cool. Serve with jam for breakfast!


Sunday, May 5, 2013

Lemon Lavender Scones


Lemon Glazed Lavender Scones
Vegan

Since The Compassionate Vegan had a tabling event at Herb Fest in Colorado Springs, I made these to pass out as samples. Quite tasty and SUPER easy to make, these are perfect for a brunch or a Mother's Day get together.... Depending on the size you shape the scones will change the amount the recipe yields. Adapted from food.com

1/2 cup organic sugar
1/2 teaspoon dried lavender buds
1/2 cup earth balance, at room temperature
egg replacer equal to 2 eggs
1 1/2 cup all purpose flour, sifted
1 teaspoon baking powder
1/4 teaspoon salt
2/4 cup hemp milk

1. Preheat the oven to 350°F; line a 12 count muffin pan with paper liners or shape into triangle scone shapes.

2. Put the sugar and lavender buds in a food processor. Process briefly to combine. Sift flour, salt and baking powder in a large bowl.

3. Tip the lavender sugar into a bowl with the earth balance and beat together until pale and fluffy. Beat the egg replacer into the earth balance mixture, a little at a time, then fold gently into the sifted flour. Stir in the hemp milk, then spoon the mixture into the muffin cups.

4. Bake for about 18 minutes until risen and golden and a skewer inserted in the center comes out clean, then transfer to a wire rack to cool.

Lemon Glaze

2/4 cups sifted organic powder sugar
the zest and juice from one lemon

1. Sift the powder sugar in a bowl. Zest the lemon and set aside. Squeeze lemon juice into the sifted powder sugar a little at a time and stirring, till you get a glaze consistency. Drizzle over the scones and sprinkle with lemon zest, store in the fridge till ready to serve.... Enjoy!


Thursday, February 28, 2013

Saffron-Vanilla Snickerdoodles

Saffron-Vanilla Snickerdoodles

These are more spicy and earthy than sweet, as far a a cookie goes. I made these to with the Christmas arrangement of sweets that I sent out to family and friends for presents. I loved the exotic flavors that come together in this cookie, and even Grant liked this one. A few extra steps in this recipe, but SO worth it.

about 30 threads of saffron (to yield 1/8 teaspoon ground saffron)
1/2 vanilla bean
2 tablespoons hemp milk
2 cups all-purpose flour
1 teaspoon baking soda
1/2 cup earth balance, at room temperature
1/2 cup organic cane sugar
1/2 cup packed organic light brown sugar
1 teaspoon kosher salt
egg replacer equvilant to 1 egg
1/2 teaspoon vanilla extract

1. Crush the saffron threads with a mortar and pestle until powdery or grind them in a clean spice grinder; alternatively, you can finely mince the saffron. The finer the powder, the more intense the saffron color and flavor in the cookies.

2. Split the vanilla bean in half and scrape the pulp into a small saucepan. Add the vanilla pod, milk, and saffron and cook over very low heat, just until bubbles begin to form at the edges, between 180°F and 190°F (82°C and 88°C). Alternatively, combine the vanilla pulp, pod, milk, and saffron in a small microwavable bowl, and microwave just until the milk is hot, 20 to 30 seconds. Cover and let steep for about 10 minutes; the milk should have a sunny yellow color.

3. Sift the flour and baking soda into a medium bowl.

4. In the bowl of a stand mixer fitted with the paddle attachment, beat the butter on low speed until smooth, 1 to 2 minutes. Add the granulated sugar, brown sugar, and salt and mix on low speed until well combined. Scrape down the sides of the bowl, then mix on medium speed until light and fluffy, 4 to 5 minutes.

5. Remove the vanilla pod from the milk, squeezing off any liquid or pulp clinging to it back into the milk. In a medium bowl, combine the milk mixture, egg, and vanilla extract and whisk vigorously until well blended. With the mixer on medium speed, add the egg mixture very slowly, in a steady stream, and mix until well-incorporated and very smooth, about 30 seconds. Scrape down the sides of the bowl, then mix on medium speed for 30 more seconds.Scrape down the sides of the bowl, then add the flour mixture. Mix on low speed just until uniform in texture. Using a rubber spatula, scrape the dough out into an airtight container or onto a piece of plastic wrap. Cover the container, or, if using plastic wrap, shape the dough into a rough disk, wrap tightly, and refrigerate for at least 3 hours and up to 5 days.

6. Preheat the oven to 350°F (175°C). Line a baking sheet with parchment paper or a silicone mat. Roll 1/4-cup (60 ml) portions of the dough into balls, and place them on the baking sheet, spacing them at least 2 inches (5 cm) apart. Bake for about 16 minutes, until golden but not too dark, rotating the pan midway through the baking time. Ideally, the baked cookies will be tall and slightly under-cooked in the center, and will buckle shortly after coming out of the oven. If the cookies don't buckle, don't worry; they'll still be delicious. Let the cookies cool on the pan for 10 minutes before removing. These cookies are best when eaten warm, shortly after they come out of the oven. However, they can be stored in an airtight container at room temperature for up to 2 days. Alternatively, the dough can stored in an airtight container in the refrigerator for up to 5 days, so consider baking only as many cookies as needed and saving the rest of the dough to bake another day.

Makes 9 large cookies.

Tuesday, February 26, 2013

Brown Sugar Orange Tofu

Brown Sugar Orange Tofu
Vegan; 30 minutes

This happens to be one of the tofu recipes the boys like. They of course like the sweetness of it, and I had to add the chilies to balance that sweetness. Serve this over rice or some noodles with wilted spinach to have more of a meal.

16 ounces extra firm tofu, cut into 1-inch cubes
1 cup unbleached-organic, all-purpose flour (use brown rice flour to make gluten free)
1 teaspoon salt
2 teaspoons vegetable oil
1 large orange or 1/2 cup orange juice
2 tablespoons brown sugar
1 Tbs. grated fresh ginger
1/2 tsp dried Thai chilies


1. Preheat oven to 350 degrees F.

2. Toss tofu in a large bowl with flour and salt. Heat vegetable oil in a large skillet. Shake off excess flour from tofu and place in a single layer in hot skillet. Saute until golden brown.

3. Spray a non-stick baking dish with cooking spray, then transfer tofu to baking dish. Squeeze the juice of an orange into the skillet with the leftover oil. Allow the oil, juice, Thai chilies and simmer until you have a slightly thick sauce.

4. Pour the sauce evenly over the tofu and top with brown sugar and ginger. Bake tofu in oven for 15 minutes until brown sugar-orange glaze starts to caramelize.

Serve warm with sauteed greens and rice, if desired.

Adapted from Tablespoon

Monday, December 3, 2012

Basic Homemade Pasta

Basic Homemade Pasta
Vegan


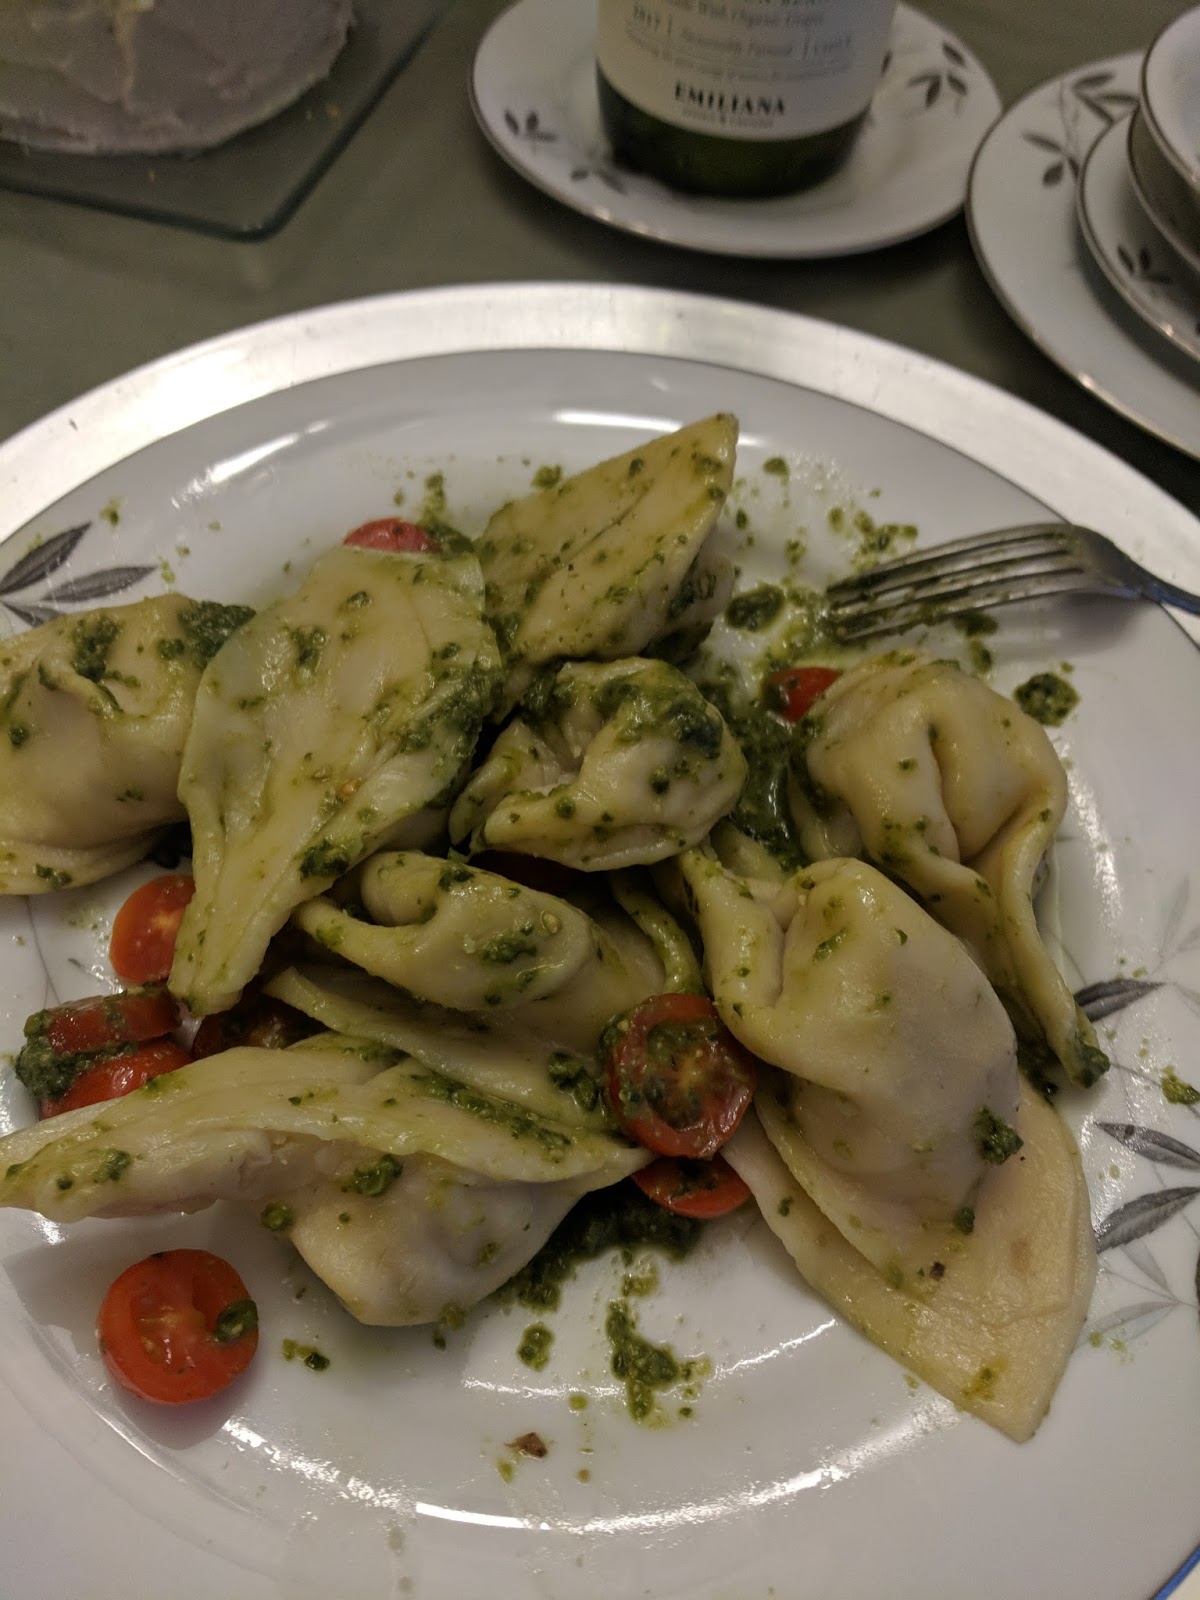
I made these the other night, and Bruce LOVED them! The boys liked the raviolis, but did not like the sauce. The sky is the limit on these, since you can make whatever kind of filling and pair them with whatever kind of sauce. I'll post some different fillings and some different sauces following this recipe. I used a ravioli maker, so I cheated a bit.... Hope you enjoy! **UPDATE : I used this recipe in making my homemade tortellini which is in the picture**

1 1/2 cups all purpose flour, plus more for dusting
1 1/2 cups semolina flour
3/4 cup of water
1 tsp extra virgin olive oil


Directions

1. Mix all ingredients together in a large bowl. Knead the dough for about 8 minutes, adding more flour if sticky or more water if the dough won't hold together well. (You can also use a bread maker.)

2. Once you have kneaded it into a smooth ball, cover with plastic wrap in a slightly greased bowl and let rest for 30 minutes.

3. Once your dough has rested, divide it in half or in quarters, for easier rolling and begin to roll each piece on a well floured surface. Continue rolling until it is about 1/8 inch thick. Once all the dough is rolled out, its time to start assembling them. You can go about this several different ways.

**The first way would be to lay out one sheet of pasta and place about 1/2 tsp of filling, two inches apart. Brush the first layer with water around the edges, then place another sheet of pasta on top and press down around the outside edges of the dough, to seal. Cut out each ravioli using a ravioli cutter or a pastry wheel.

**The second way would be to cheat and use a ravioli maker (I use this one). You basically do the same as above but using one of these helps to get each ravioli to the exact same size.

4. Place one piece of dough and fill each ravioli with filling of choice.

5. Brush the first layer with water around the edges and place the top layer over the bottom layer.

6. Press and seal the outside edges of the dough, using your fingers. Roll across the top dough to cut out. Flour the ravioli and set out to dry a little making sure to keep each ravioli separate from the others because if they touch they will stick like crazy.

7. Once done, place in a pot of boiling water and cook until al dente, 7-10 minutes. Remove and drain well.

To Serve - Place in a large bowl and add the sauce of your choice. Divide the raviolis among four plates.

Monday, November 19, 2012

Pumpkin Burgers


Pumpkin Burgers
Vegan; Makes 6 patties

With all of the pumpkin I still have, I'm finding different recipes for it. I made these last, and they are really good! Since my pumpkin had already been pureed, these didn't take very long to make. I served these with an old favorite, chipotle mayo and Brussels sprouts on the side (recipe will follow).

1 15oz. can of chickpeas, drained and rinsed
1 cup fresh pumpkin puree
egg replacer equivalent to 1 egg
1 red bell pepper, diced
1/4 onion, diced (add more if you like onion)
1 garlic clove, minced
1/2 teaspoon cumin
1/2 teaspoon coriander
1/2 teaspoon chili powder (if you like it a little hotter add 1 teaspoon)
salt and pepper to taste
1/2 cup flour
1/2 cup bread crumbs

1. Saute garlic, onion and red bell pepper, until soft. About 5 minutes.

2. In a food processor, add chickpeas, egg replacer, cumin, chili powder, and coriander. Pulse until smooth.

3. In a large bowl, combine flour, breadcrumbs, chickpea mixture and pumpkin until mixture is stiff enough to from and hold patty shape. In a skillet (I used a little oil to coat the pan) over medium high heat, cook patties until golden brown. About 5 minutes on both side.

Wednesday, November 14, 2012

Green Pea Poulourie

Green Pea Poulourie
Vegan; Can be made Gluten Free

Having an abundance of green split peas came in handy for this recipe! Bruce and I both had a bag when we combined kitchens. This recipe came out more falafel like, so I served them with Tzatziki sauce and flat bread.

1 (14 ounce) bag dried green or yellow split peas
3 cloves garlic, crushed (I had to use garlic powder since I ran out of fresh garlic)
1 tablespoon curry powder
1 teaspoon salt
1 serrano pepper, seeded and chopped
1/2 cup all-purpose flour, plus additional (use gluten free flour)
1 tablespoon baking powder
oil for frying

1. Pick through the split peas removing rocks, then rinse. Soak, covered by 2-inches of water until soft enough to be broken with your fingernail, 3 hours to overnight. (Short on time, I put the split peas in the rice maker and put the setting on Brown Rice. It worked pretty good.)

2. When soft, drain peas, then puree in 1 cup batches in a food processor or blender until smooth along with the garlic, curry powder, salt, and serrano pepper. Add water as needed to make a thick paste. Sift baking powder and 1/2 cup of flour into a large bowl then stir in the pea puree, adding additional flour to make a stiff batter.

3. Heat a heavy skillet over medium-high heat to 375 degrees F (190 degrees C).

4.Form into small patties and place into the hot oil in batches for about 10. Turn when the bottoms turn brown, and continue cooking to brown the other side, about 5 minutes. Drain on paper towels, and sprinkle with additional salt if desired.

Thursday, September 27, 2012

Buffalo Tofu Bites


Buffalo Tofu Bites
Vegan; 1 hour

With an hour being the time, I promise-this is the type of recipe that is not as hands on. Step number 3 is what may take the most hands on, however I promise this is worth it! Grant and Max liked it, and this is perfect for any tale gate parties that are coming up!!

1 cup of hemp milk
2 tbsp corn starch
1 15 ounce block of firm tofu (organic), pressed to remove excess water
1/2 cup all-purpose flour
1/2 teaspoon paprika
1/2 teaspoon cayenne pepper
1/2 teaspoon garlic powder
1/2 teaspoon salt
1/4 cup Earth Balance butter, melted
1/4 cup Saso Roasted Red Pepper Chipotle Sauce
1/2 tbsp of garlic powder
a dash of black pepper

1.Preheat oven to 400 degrees.

2. In a medium sized bowl mix the hemp milk with the corn starch and set aside.

3. In another medium sized bowl mix together the flour, paprika, cayenne pepper, garlic powder and salt. Next, cut the tofu in triangles; to do this first slice the tofu in half so that there are now 2 slabs of tofu, then cut each slab into thirds on the short side, then cut in half on the long side. Now you should have 12 small squares of tofu, slice each one of those on an angle to get triangles. See images below.

4. Now place the tofu triangles into the milk mixture and coat them, then dredge them into the flour mixture and get each side covered completely. Cover dish or bowl and refrigerate for an hour.

5. In a large bowl whisk together the melted butter, hot sauce, garlic powder and black pepper. Dip each piece of tofu in the mixture and place on a lightly oiled baking sheet. Bake for about 30-35 minutes turning halfway through. If you want them crispier just bake them a little longer. I served these with a vegan ranch dressing.

Tuesday, September 25, 2012

Zucchini Fritters


Zucchini Fritters
Vegan; Serves 4; 30 min. plus baking

I comprised this recipe from 3 different ones, taking the best out of each and then making the recipe vegan. I could have used 1 more grated zucchini, but they still came out tasty! Bruce told me that he would love to have these again, so I may even surprise him with a repeat! ~_^

2 cups grated zucchini squash
4 Tablespoons all purpose flour
1/3 cup cornmeal
1 small onion, finely chopped
1 clove of garlic, finely minced
1 egg replacer
2/3 cups tofu feta
1-2 teaspoons crushed red pepper (depending on taste)
Kosher salt and black pepper to taste

1. Preheat oven to 400 degrees. Line a baking sheet with parchment paper.

2. Place zucchini inside a tea towel or flour sack towel and squeeze out excess moisture.
In a bowl, add the ingredients adding the zucchini last. The mixture with be sticky and thick. Continue to stir, it will thin down. You want it to look like a thick cake batter.

3. On a parchment lined baking sheet, divide batter into 6 mounds on the parchment using a spoon or ice cream scoop. Then flatten each mound with a spoon or your hand to form 4 inch rounds.
Bake for 15-18 minutes or, until the fritters are deep golden brown on the bottom. Then turn to broil and place on the second highest rack in your oven. Broil on high for a few minutes, you want to crisp them up but watch carefully so they won't burn (I skipped this step). Served with cashew cream or marinara sauce.

Recipe adapted from The Yellow House.

Monday, September 17, 2012

Puff Pastry

Puff Pastry
Vegan

This was actually not as bad or as hard as I thought it was going to be. This did take up the bulk of dinner making, but everything was ready at about the same time.... This recipe comes from Holy Cow! Vegan. I ran out of all-purpose flour, so I used 1 1/3 cup all-purpose and the rest was whole wheat flour and the original recipe calls for 2 sticks of Earth Balance (I also ran out of).

Ingredients:

2 cups all-purpose flour
1 1/2 sticks Earth Balance + 1/4 cup of all-purpose flour
1 tsp salt
Water as needed

1. Place the two cold sticks of butter, straight out of the fridge, on a chopping board or the kitchen platform. Sprinkle the 1/4 cup of all-purpose flour over it and, using a rolling pin or something heavy, beat the butter until it flattens out quite a bit but is still quite solid.

2. Pat the edges of the butter to form a square. Place in a container and refrigerate for at least 30 minutes.

3. In a bowl, place the 2 cups of flour, salt and, using enough water, knead into a smooth and pliable dough.

4. Allow the dough to rest for a few minutes, then roll it out into a square large enough so you can wrap the square of butter in it.

5. Once you have wrapped the butter, making sure it is well-sealed, then roll out the dough into a rectangle about 7 inches wide and 10 inches long. Do this preferably on a metal baking sheet so you have a cool surface and also so you can easily transfer the dough to the fridge. The rolling might take a little work because the dough can be resistant, but be patient.

6. Now lift the edges of the rectangle along the long side and fold over one another so you have three layers. Place the sheet with the puff pastry in the fridge and let it stand for at least 15 minutes. Then remove and roll out again and fold again to make three more layers. Repeat four more times.

Sunday, September 16, 2012

Double Carob Cherry Muffins


Double Carob Cherry Muffins
Vegan; 1 hour 30 min; 12 (or more)

Depending on how big your muffin pan is, you may get more then 12. I got about 20, but this just means more to share.... I ended up having to add more hemp milk at the end, to get the right consistency, since I live in a higher altitude.Feel free to use semisweet chocolate instead of the carob. Since I have a food allergy, I used the carob with great results!

Ingredients
2 cups all-purpose flour
1 sugar
1/3 cup carob powder
3 teaspoons baking powder
1/2 teaspoon salt
pinch of cinnamon
1 cup soy yogurt
1/2 cup hemp milk
1/3 cup vegetable oil`
egg replacer the equivalent of 2 eggs
1 teaspoon almond extract
2 cups fresh dark sweet cherries, pitted and chopped
1 cup miniature carob chips

Directions

1. Preheat an oven to 400 degrees F (200 degrees C). Grease 12 jumbo (3 1/2-inch) muffin cups or line with paper baking cups.

2. Stir together the flour, sugar, carob powder, baking powder, pinch of cinnamon and salt in a separate large bowl, and make a well in the center; set aside. Whisk together the soy yogurt, hemp milk, vegetable oil, egg replacer, and almond extract in a bowl until evenly blended. Pour the soy yogurt mixture into the well, then stir in the flour mixture until just combined. Fold in the cherries and carob chips. Spoon into prepared muffin cups, filling half full.

3. Bake until a toothpick inserted into center comes out clean, about 20 to 25 minutes. Cool in pan on wire rack 5 minutes. Remove from pan and cool completely on wire rack. Store tightly covered at room temperature.


Thursday, August 23, 2012

Strawberry Mousse Cupcakes

Strawberry Mousse Cupcakes
Vegan; Makes 16

Speaking of birthdays, I made these a few years ago for mine. So, these were my "Stuck in the Middle with You" cupcakes to with my Quentin Tarantino themed party. These turned out really good, my non-veg friends were very impressed! I warn you, there are a lot of steps-so worth it!

For the Cupcakes:

1 Tbsp. apple cider vinegar
1 1/2 cups vanilla soy milk
2 cups plus 2 Tbsp. all-purpose flour
1 cup plus 2 Tbsp. organic sugar
2 tsp. baking powder
1/2 tsp. baking soda
1/2 tsp. salt
1/2 cup canola oil
2 tsp. vanilla extract

1. Preheat the oven to 350ºF. Line a cupcake pan with cupcake liners.

2. Mix the vinegar and soy milk together and set aside.

3. Sift together the flour, sugar, baking powder, baking soda, and salt in a large bowl and set aside.

4. In another bowl, stir together the soy milk mixture, the canola oil, and the vanilla extract and add to the dry ingredients, mixing well.

5. Fill each cupcake liner about two-thirds full. Bake for 20 to 25 minutes, or until a toothpick inserted in the middle of a cupcake comes out clean.

6. Let cool in the cupcake pan for 5 minutes, then remove and place on a wire rack. Let cool completely before frosting.


For the Strawberry Filling: (This part can be cut in half, I had WAY too much left over)

2 cups fresh strawberries, sliced
1/2 cup organic apple juice
1/4 cup organic unbleached granulated sugar
4 tsp. cornstarch
1/2 cup water

1. Place the strawberries and apple juice in a saucepan. Bring to a boil and simmer for about 10 minutes, until the strawberries soften.

2. While stirring, slowly add the sugar. Dissolve the cornstarch in the water and add to the saucepan. Heat until thickened, being careful not to boil.

3. Remove from the heat. While still warm, blend briefly with a hand blender, creating the consistency of a very thick purée. If you do not have a hand blender, use a traditional blender instead.

4. Refrigerate for 30 minutes to 1 hour, until jelly-like.

For the Strawberry Mousse:

1 cup vegan margarine
1/4 cup nonfat soy milk
1 tsp. vanilla extract
4-5 Tbsp. prepared strawberry filling
5-6 cups organic powdered sugar
1 drop red food coloring (optional)

1. Beat the margarine until creamy. Add the soy milk, vanilla, and strawberry filling and mix well. Add the powdered sugar a little at a time, beating well after each addition. Stir in the food coloring, if desired. Beat for 5 to 10 minutes.

To Assemble:

1. Cut a cone-shaped piece out of the top of each cupcake. Fill with 1 to 2 teaspoons of the strawberry filling. Replace the cupcake top and frost with the strawberry mousse.

Found: PETA

Tuesday, July 24, 2012

Looks Not So Simple-Very Simple Cherry Pie


Looks Not So Simple-Very Simple Cherry Pie
Vegan

When I made this for Bruce, he instantly fell in love with it. So much, that he didn't even share with his boys. Since my oven had been on ALL day, earlier I made 9 dozen dog biscuits for a fund raiser, my crust edges ended up being darker then I would have liked.... I used a small star cookie cutter for the design.

Two rolled out basic pie dough (see recipe)
1 cup sugar
3 Tablespoons cornstarch
1/4 teaspoon salt
4 cups (1 1/2 pound) drained jarred or canned pitted sour cherries, plus 1/3 cup cherry liquid
1 teaspoon vanilla extract
1 Tablespoon cold earth balance

1. Fold 1 dough round in half and carefully transfer to a 9-inch pie pan. Unfold and ease the dough into the pan without stretching, patting it firmly into the bottom and up the sides of the pan. Using kitchen scissors or a knife, trim the edge of the dough leaving a 3/4-inch overhang. Refrigerate the dough lined pan and reserved dough round till ready to use.

2. In a small bowl, stir together the sugar, cornstarch, and salt. Place the cherries in a large bowl. Sprinkle with the sugar mixture, tossing to cover evenly. Add the vanilla and mix well. Pour the cherry mixture into the prepared pie crust and dot with earth balance.

3. Lay the second pie dough on a lightly floured work surface and cut a pattern using a small cookie cutter. Or, cut into strips to make a lattice pattern using a sharp paring knife. If using a cookie cutter, save the shapes for decorating the top. Fold the dough in half and carefully position over half of the filled pie. Unfold the dough, and fold the edge of the top dough under the edge of the bottom dough. Crimp the edges with a fork. Apply cutouts to the top of the dough, applying a dab of water to the bottom of each cutout to help them stick. Refrigerate pie until the dough is firm (about 30 minutes). Preheat oven to 425 degrees.

4. Bake pie for 15 minutes, then reduce the temperature to 350 degrees and bake until the crust is golden and the filling is thick and bubbling. About 40-50 minutes longer. Let cool completely to set the filling. Warm pie again before serving.

Adapted from Willams Sonoma Fruit Desserts


Friday, July 20, 2012

Basic Pie Crust~Vegan Style

Basic Pie Crust
Vegan

I'm old school, so I always make my pie crust from scratch. However, to make this recipe even more simple you can buy prepared pie crust-just make sure to read the ingredient list.

Here is the basic pie crust recipe-double it for both layers.
1 1/4 cup all purpose flour
1 Tablespoon sugar
1/4 teaspoon salt
1/2 cup cold earth balance, cut into cubes
3 Tablespoons cold water (being in a higher altitude, I keep having to add more liquid)

1. Stir together the flour, sugar, and salt. Using two knives, cut the earth balance into the flour mixture until the texture resembles coarse cornmeal, with earth balance pieces are no larger than small peas. Add the water a little at a time and mix with a fork just until the dough pulls together.

2. Transfer the dough to work surface, pat into a ball and flatten into a disk. Lightly flour the work surface, then flatten the disk with six to eight gentle taps of the rolling pin. Lift the dough and give a quarter turn. Lightly dust the top of the dough or the rolling pin with flour as needed, then roll out the dough into a round disk about 12 inches in diameter and about 1/8 inch thick.

**Note: Pie crust can be frozen for up to two months. To freeze, place dough on a 12-inch cardboard circle and wrap it well with plastic wrap.

Adapted from William Somona Fruit Desserts

Friday, June 22, 2012

Classic Vanilla Cake (Vegan Style)

Classic Vanilla Cake (Vegan Style)
45 minutes bake time

I made this for Bruce on Father's Day, and of course he loved it! In fact, I'm not sure if the boys even got to have any of it. To make it moist in the higher altitude I needed to put one cup of hemp milk instead of the 3/4 cup. Instead of frosting, I made a raspberry blueberry glaze (recipe to follow).

3 cups all-purpose flour
1 Tbs. baking powder
1/2 tsp. salt
1 1/3 cups sugar
1/2 cup vegan margarine (I used Earth Balance)
1 1/2 tsp. egg replacer
1 cup hemp milk
2 tsp. vanilla extract

1. Preheat oven to 350 degrees. Spray one 9 inch round cake pan with oil and dust with flour. Set aside.

2. Sift together flour, baking powder, and salt into a bowl. Cream sugar and margarine with an electric mixer for about 5 minutes, or until fluffy. (Mine looked more like little course balls of fluff.)

3. Stir egg replacer into 1/2 cup of water (I always mix it in my measuring glass cup). Add to sugar mixture, and beat until combined. Combine hemp milk and vanilla in bowl. Reduce mixer speed to low, and alternate adding flour mixture and hemp milk mixture, ending with hemp milk mixture. (Do not over mix.)

4. Fill cake pan and bake 40-45 minutes, or until center comes out clean. Cool.
**Note- You can make this recipe as cupcakes bake for 16-19 minutes.

Found: Vegetarian Times March 2012